Make Harmonova your own
Harmonova works straight out of the box with a Key of C 10-hole harmonica. But everyone plays a different instrument in a different room, and both of those change how your harmonica sounds to the app. Spend a few minutes telling Harmonova about your gear and your space, and note detection gets noticeably more accurate.
There are two things you can set up: your instruments (which harmonicas you own) and your environments (the rooms you play in). You’ll find both in the top bar — your active instrument and environment are always shown there — and in the ☰ slide-out menu.

Instruments — What are you playing?
Open Instruments from the menu to see your harmonicas. Harmonova starts you off with the built-in Key of C 10-Hole Harmonica; the one with a star ★ next to it is the active one that recording and practice currently use.
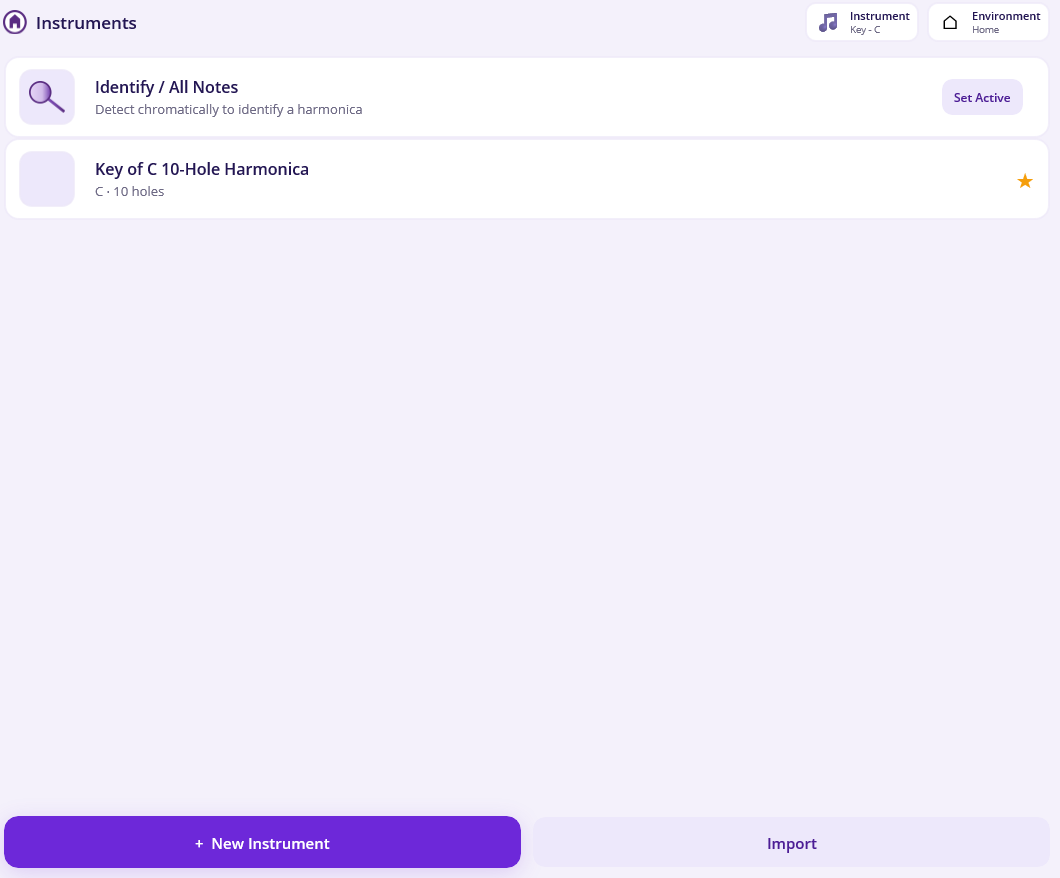
- Tap Set Active on any instrument to switch to it.
- Tap a row to open its details.
- Tap + New Instrument to add one of your own.
Adding a harmonica
When you create a new instrument you give it a name, choose its key (any of the twelve), and pick a hole count (4, 6, 7, 8, 10, 12, 14, 16, 24, or a custom number). Harmonova fills in a sensible standard layout for that key and size, which you can then fine-tune.
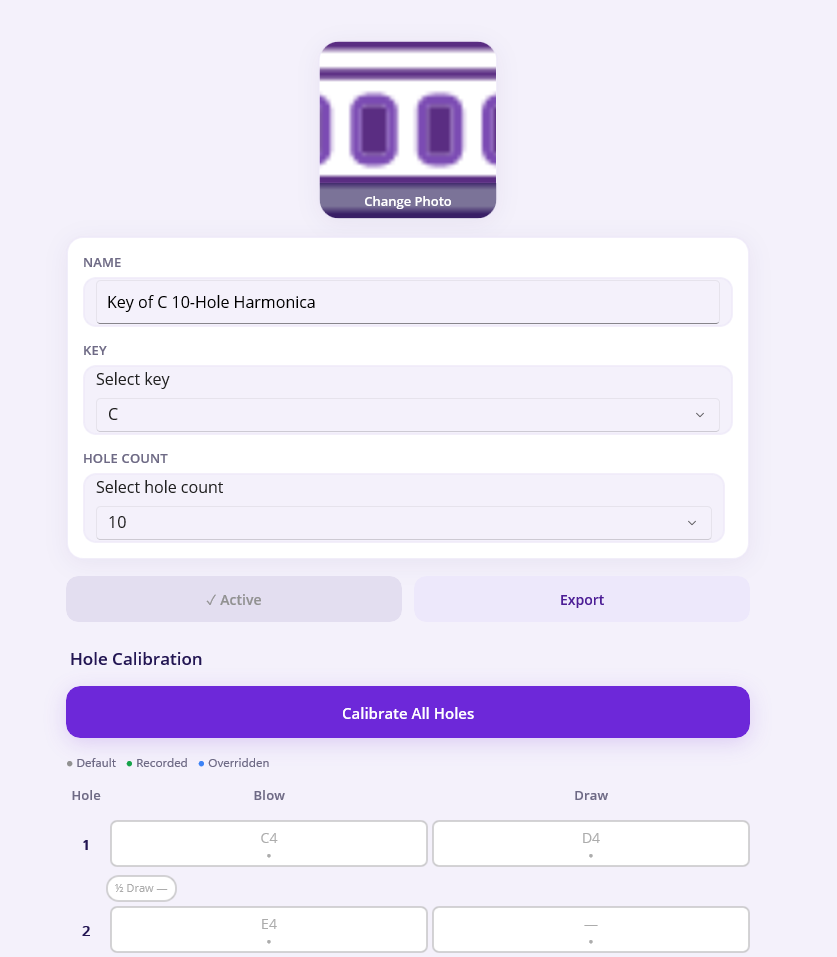
On the details screen you can also:
- Add a photo so you can recognise the instrument at a glance.
- Change its name, key or hole count (Harmonova warns you if a change would discard notes you’ve recorded).
- Set as Active, Export it to a file, or Delete it.
Note
The built-in Key of C harmonica comes with audio samples ready to play. For an instrument you create yourself, those samples are captured when you calibrate its holes (see below) — so once you’ve calibrated it, your custom instrument plays back through the speakers too.
Calibrating each hole
The notes on a real harmonica are never exactly where the textbook says. Calibration does two jobs at once: it teaches Harmonova the true pitch of each of your holes so it recognises your playing correctly, and it records a sample of each hole so your instrument can be played back through the speakers — just like the built-in Key of C harmonica.
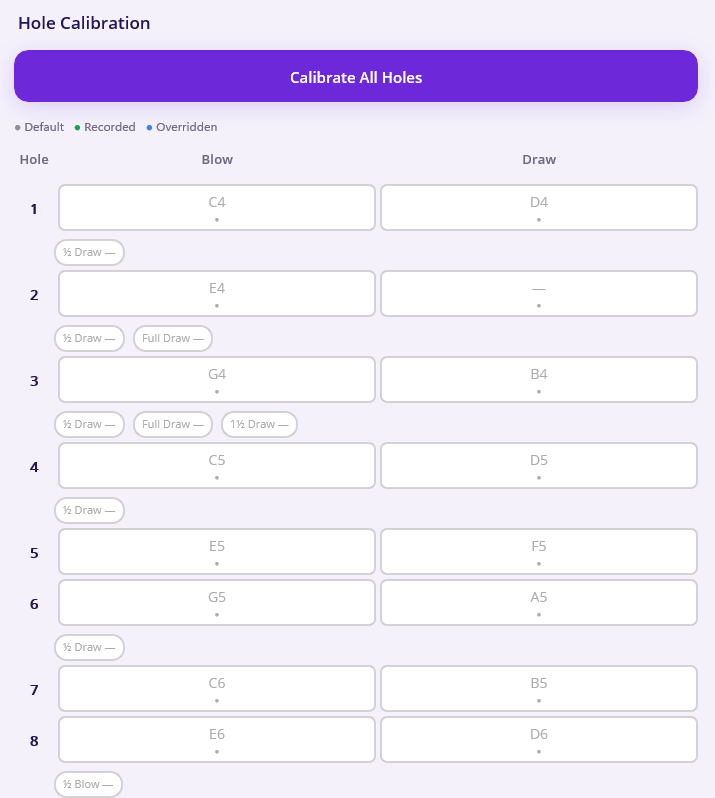
On the instrument’s details screen, the Hole Calibration grid shows every hole’s blow and draw note. Each is colour-coded:
- ⚫ Grey — Default: still using the standard layout.
- 🟢 Green — Recorded: you’ve played this hole and Harmonova captured it.
- 🔵 Blue — Overridden: you set this note by hand.
You have two ways to calibrate:
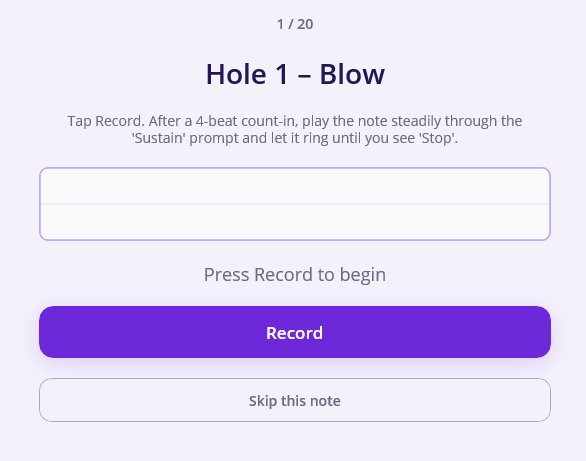
Calibrate All Holes — the quickest route. Choose whether to record blow notes, draw notes (and bends, where your instrument has them), then play each note in turn as Harmonova prompts you. Tap Record, wait for the four-beat count-in, hold the note steadily until you see Stop, and it moves to the next one. At the end you review everything and Save All. You can Skip any note you can’t play.
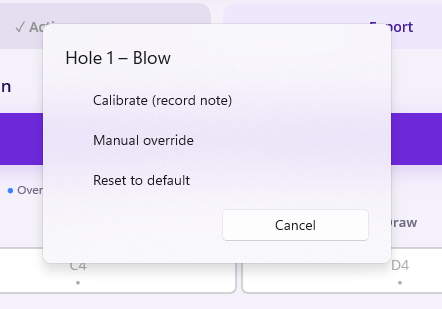
One hole at a time — tap any cell in the grid to calibrate just that hole and action. Same idea: Record, play the note, and Confirm the detected pitch. If Harmonova can’t make it out, tap Manual Override to pick the note from a list instead.
Import and export your instruments
Set up a harmonica just the way you like it? Tap Export on its details screen to save it to a file (with its photo and all your calibration), then keep it as a backup or move it to another device. To bring one in, tap Import on the instruments list and choose the file. Re-importing your own backup never clashes — Harmonova always brings it in as a fresh copy.
Environments — Where are you playing?
A room’s acoustics — how sound echoes and fades — affect how cleanly Harmonova can tell one note from the next. An environment stores those acoustic settings for a particular place, so switching rooms doesn’t spoil your detection.
Open Environments from the menu. Harmonova gives you a Home environment to start with; the one with a tick ✓ is active.
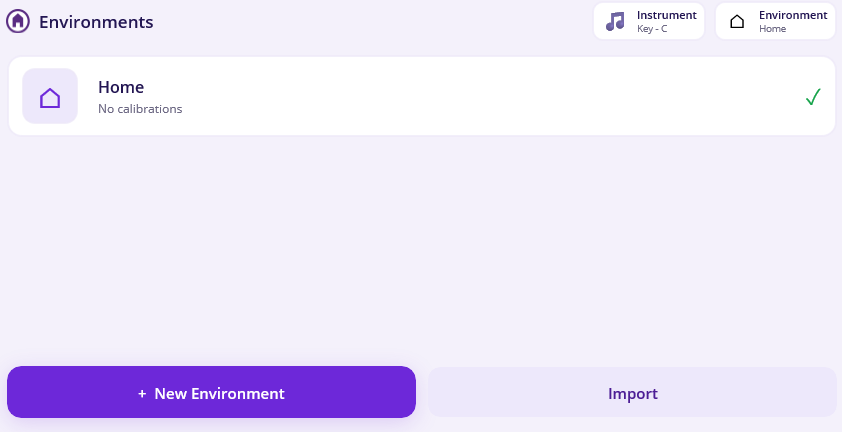
- Tap Set Active to switch the room you’re playing in.
- Tap a row to open its details.
- Tap + New Environment to add another place — “Garage”, “Practice room”, “Mum’s kitchen”, whatever you like.
On an environment’s details screen you can rename it, give it a photo, set it active, and export it. Home can’t be deleted, but you can Reset Home to defaults if you ever want to start it over; any other environment has a Delete Environment button instead.
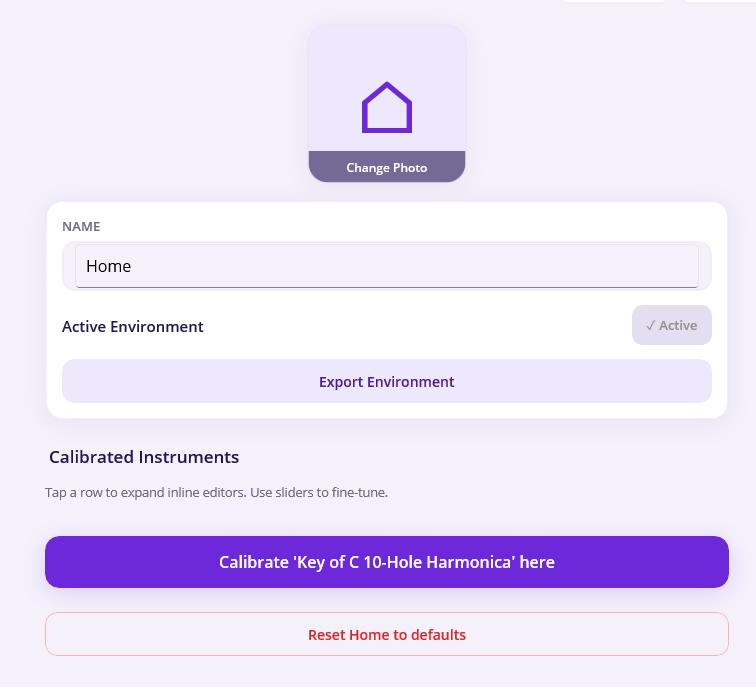
Calibrating an instrument in an environment
This is where instruments and environments come together. Calibration is stored per instrument and per environment, because the same harmonica behaves differently in different rooms.
On an environment’s details screen, tap Calibrate current instrument here (or Calibrate next to an instrument already in the list). This launches the calibration wizard.
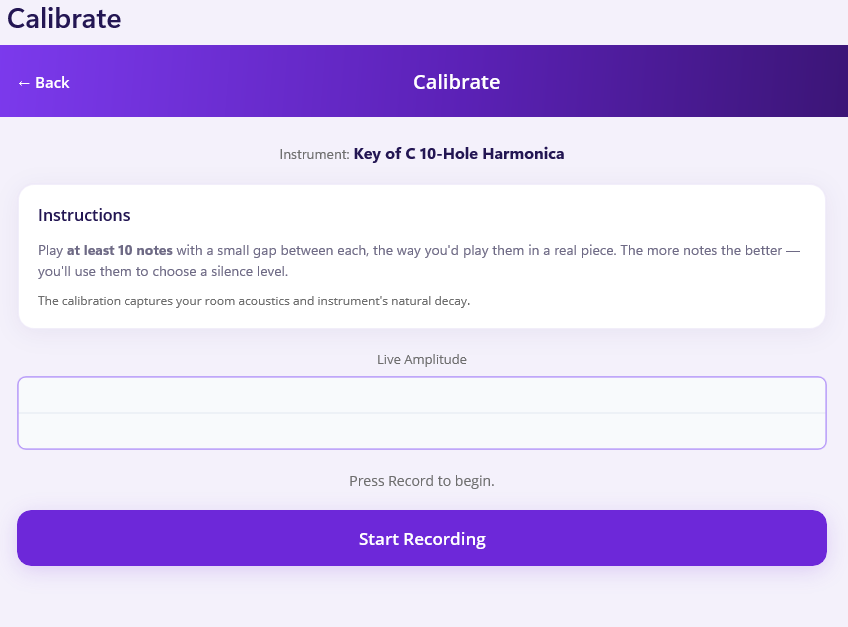
- Play at least ten notes, with a small gap between each, just as you would in a real piece. The live meter shows Harmonova is hearing you. The more notes the better.
- When you stop, you reach the review screen. Harmonova shows your recorded sound as a waveform with a red line marking where it detected each note beginning.
- The orange line on each note marks the level your playing must dip below — and climb back above — for Harmonova to count the next note as separate. The New-note sensitivity slider adjusts this. Lower means a small dip starts a new note; higher means the dip has to be deeper. Most players settle between 40% and 70%.
- Happy with it? Tap Accept. Not quite right? Tap Re-record and try again.
That calibration is now saved for this instrument in this environment, and recording and practice will use it automatically.
Note
You don’t have to calibrate — Harmonova will always record without it, just a little less accurately. Whenever you’re recording with an uncalibrated instrument-and-room combination, a gentle Calibrate prompt appears so you can improve things when you’re ready.
Note
While a recording or practice session is running, the Instrument and Environment chips in the top bar are locked. Finish your session first, then switch.
Once your gear and your room are dialled in, head back to Recording and enjoy noticeably cleaner note detection.