Recording
The Quick Start walked you through your very first recording. This page covers the Create Music screen properly — every button, what happens while you play, and how to tidy up the notes afterwards.
You can reach Create Music in three ways:
- Tap the ● Create Music button on the Dashboard.
- Open the slide-out menu (the ☰ icon in the top bar) and choose Create Music.
- Tap + New Piece in your Music Book.
The Create Music screen
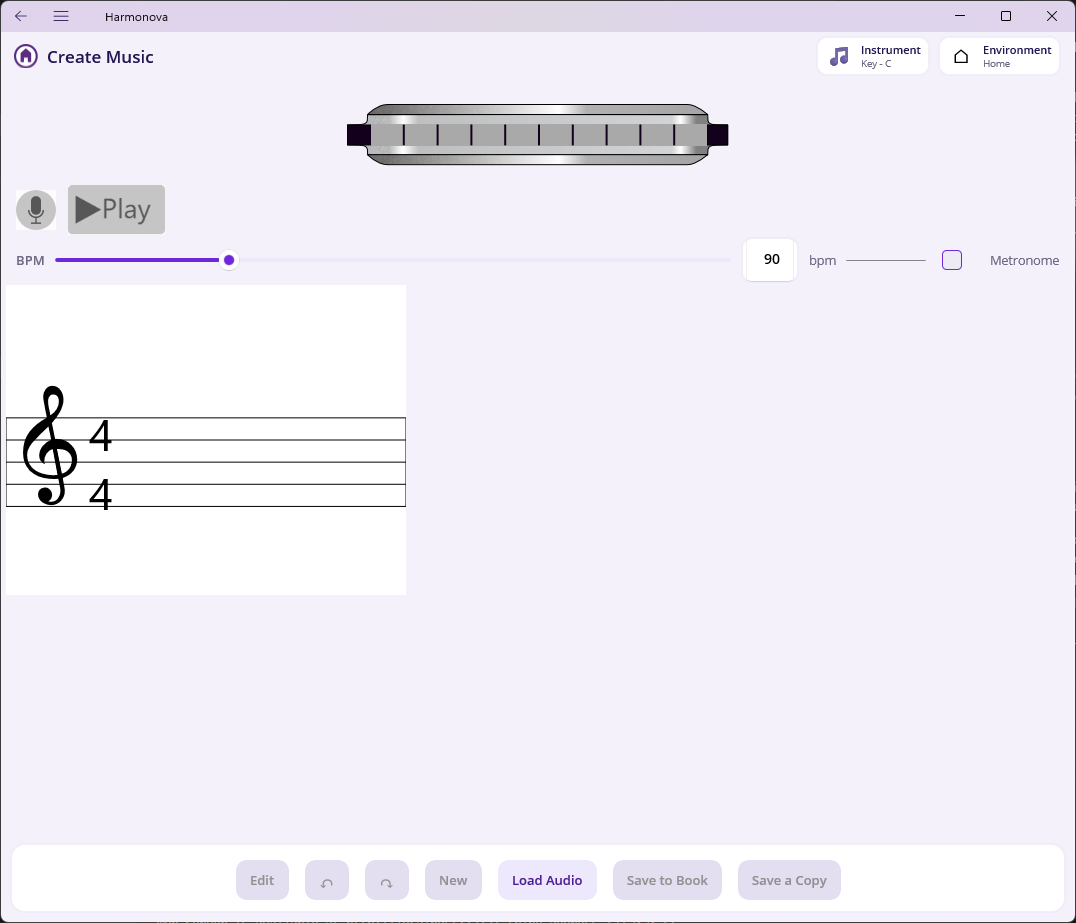
There’s a lot here, so let’s go from top to bottom.
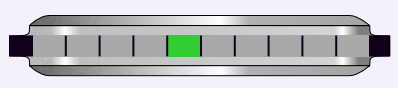
- The harmonica
A picture of your instrument. As you play, the holes you’re sounding light up green, so you can check Harmonova is hearing the same hole you’re blowing.
- The detected note
As you play, the note Harmonova currently hears is shown here in green.
- The record and play buttons
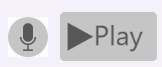
The microphone starts and stops recording; the play button (greyed out until you have some notes) plays your piece back.
- The tempo bar

Set your beats-per-minute (BPM) and switch the metronome on or off.
- The music sheet
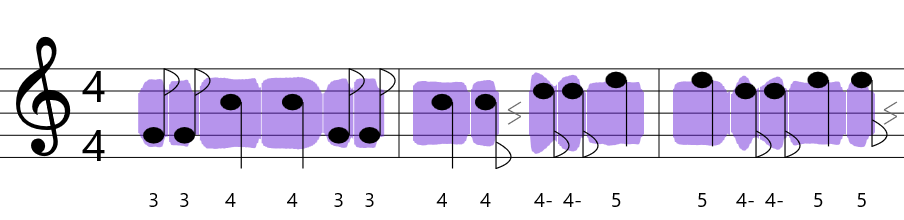
Where your notes appear as you play.
- The actions bar

- Edit - Access to cut and paste functions when editing a music sheet.
- Undo, Redo - Used when editing the notes on the music sheet and you wish to reverse an action or redo an action.
- New - Create a new music sheet, clearing any current notes in the sheet.
- Load Audio - Loads a wav file and analyses its contents, transcribing any detected notes onto the music sheet. If a harmonica is selected, the current harmonica is used to match notes. If the All Notes harmonica is selected, then the harmonica is identified and all notes transcribed.
- Save to Book - Saves the music sheet to your music book, if it already exists, then it is replaced.
- Save a copy - Saves a copy of the current music sheet to your book allowing you to make changes to a music sheet and saving a revised version.
Note
The top bar always shows your active Instrument and Environment. Recording uses those two together to hear you accurately. If you haven’t set them up yet, Harmonova works out of the box with a Key of C 10-hole harmonica — but a quick calibration makes detection noticeably better. See Make Harmonova your own.
Live recording
Set your tempo first
Before you record, set the tempo on the BPM bar. The number is your beats per minute — higher is faster. If you’d like a click to play along to, tick the Metronome box.
The tempo matters: Harmonova uses it to decide whether a note you held was a quarter note, a half note, and so on. Pick a speed you can comfortably play at — you can always speed a piece up later when you practise it.
Note
You can set a default BPM that every new piece starts at in Settings.
Start playing
Tap the microphone  to begin. Harmonova gives you a four-beat count-in — the microphone glows amber
  while it counts you in, so get ready. When it turns red
  , it’s listening.
Warning
The first time you record, your device will ask for permission to use the microphone. Harmonova can’t hear your harmonica without it, so tap Accept if prompted.
As you play, notes appear on the sheet. You’ll notice each note grows while you hold it — starting short and stretching out from a sixteenth, to an eighth, to a quarter and beyond — so you can watch the length build in real time. If Harmonova labels a note and then corrects it a moment later, that’s normal: it keeps re-checking the pitch as the note settles, so an early guess fixes itself.
When you’ve finished, tap the microphone again. It turns grey
and your piece is ready to play back, edit, or save.
Play it back
Tap the play button  to hear your piece. A green line sweeps across the sheet in time with the music so you can follow along. Recording and playback can’t happen at once — starting one stops the other.
Note
Play-back plays the recorded samples for your instrument. The built-in Key of C harmonica comes with samples ready to go; for an instrument you’ve created yourself, playback uses the samples captured when you calibrated its holes. So calibrate a new instrument and it plays back through the speakers just like the built-in one.
Tidying up your notes
Real playing is rarely perfect, and Harmonova doesn’t expect it to be. Once you’ve recorded something you can fix wrong notes, change lengths, and rearrange phrases without re-recording.
Select and change a note
Tap any note to select it — it gets a blue outline and a small dial appears around it.

The dial’s segments let you, for the selected note:
- Add a new note after it, the new note is the same as the selected note, you can then change the new notes pitch or length as you desire.
- Delete it.
- Shorter / Longer — change how long the note lasts.
- Add Rest - adds a rest after the selected note.
- ↔ Alternate hole — switch to another hole that plays the same pitch or chord combinations for the hole.
- ⬚ Select — start selecting this note and the ones around it, ready to copy, cut and paste (see below).
You can also drag a note directly, dragging means click or touching the note and moving the note with the mouse button or your finger held down:
- Drag it up or down to change its pitch — it snaps to the staff lines, and a faint “ghost” note shows where it will land.
- Drag it left or right to move it earlier or later, even into a neighbouring bar. The rest of the piece shuffles up to make room.
Undo, redo and starting over
Made a change you didn’t mean to? The Undo  and Redo
  buttons step back and forward through your edits. On a computer you can also use Ctrl + Z and Ctrl + Y.
The New button clears the sheet so you can start a fresh piece. (Harmonova will check first if you have unsaved changes.)
Copy, cut and paste
To work with a run of notes at once — to repeat a phrase or move a section around — first start a selection:
- Tap a note to bring up its dial, then tap the ⬚ Select segment. That note becomes a one-note selection, with a draggable handle at each end.
- Drag either handle to grow or shrink the selection across as many notes — and as many bars — as you like.
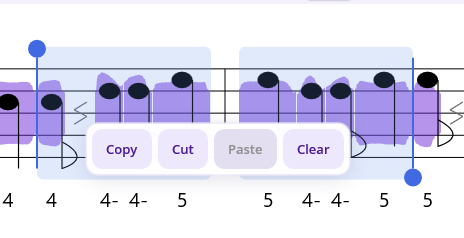
A small toolbar appears over the selection with Copy, Cut, Paste and Clear, so you can repeat a phrase or move a section around. Paste drops the notes back in: tap in the gap between two notes first to choose exactly where they land, otherwise they go in straight after the current selection.
On a computer the usual shortcuts work too — Ctrl + C, Ctrl + X, Ctrl + V — and you can hold Shift and press the left/right arrows to extend your selection a note at a time.
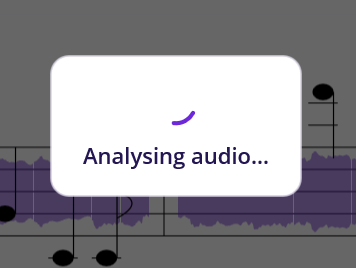
Transcribing audio
Don’t fancy playing live? Harmonova can listen to an existing audio recording and transcribe it exactly as if it had come through the microphone.
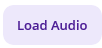
Tap Load Audio on the actions bar and pick a WAV file from your device.
Harmonova analyses the file — this takes a few seconds, and you’ll see an Analysing audio… spinner while it works — and then drops the detected notes onto the sheet, ready to edit and save just like a live recording.
Note
Transcription works best on a clean recording of a single harmonica. Backing tracks, other instruments or heavy background noise make it much harder for Harmonova to pick out the right notes.
Saving your work
When you’re happy, save the piece to your Music Book:
- Save to Book stores the piece (Harmonova asks for a name the first time).
- Save a Copy saves it again under a new name — handy for keeping a variation without overwriting the original.

Once it’s in your Music Book you can rate it, tag it, practise it and share it. Head over to the Music Book page to see how.